In the first two parts the focus was on the introduction of the topic and how data are read out via Modbus RTU.
In this third part of this blog series we would like to explain how data are read out via Modbus TCP from meters capable of TCP/IP.
To achieve this, our devices act as Modbus TCP Client and use exclusively the function code 0x03 “Read holding register”.
As stated in the first part already, the function Modbus TCP Client will be available by default on all data concentrators (data loggers).
So much for theory, let’s proceed to praxis.
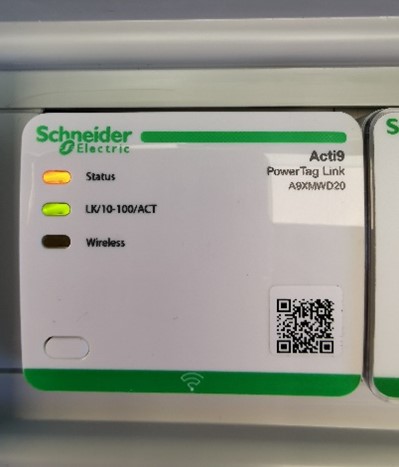
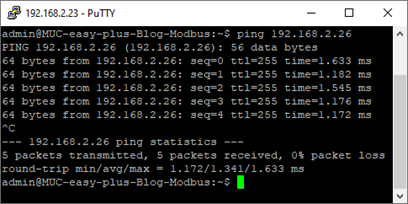
Before commencing with the configuration of the website, the Modbus meter has to be integrated into the network. In this particular case it is a Schneider electric PowerTag. This one is first set to DHCP and then the assigned IP address is to be recorded. To verify connectivity, open a SSH console and ping the device. You receive a response.


Hence, the way is paved for reading out via Modbus TCP.
Let’s now create a Modbus TCP meter on the website and configure the readout procedure.
Add meter
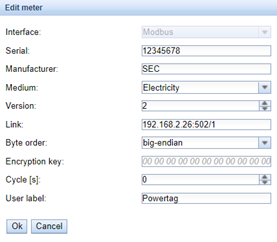
The meter is created as shown on the following screenshot.
Similarly to Modbus RTU, the parameters “Serial”, “Manufacturer“, “Medium“ and “Version“ are optional and are not used in the protocol. But it serves as an aide to get an overview if several meters are used.
For the parameter “Link” the target address has to be specified according to this style:
target address:port/client ID
To finalise, the context menu is confirmed with OK.

Configuration of the meter value
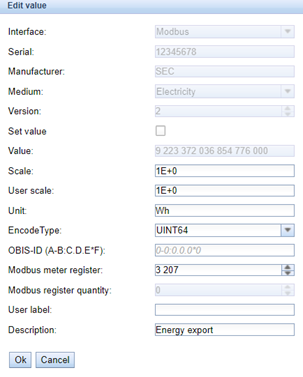
The creation of a meter value is identical to Modbus RTU. Make a right mouse click on the meter just generated and select “Add value”. Then, the required information is inserted as explained in the manual. The parameters are explained in the second part of the blog series.

After the successful configuration, the created Modbus TCP meters are automatically read according to the set readout interval.
In contrast to M-Bus, Modbus is not self-describing, and hence it does not offer the option to query with a single request entire data sets and related information, like scaling and unit. That’s why we would like to demonstrate in the fourth part how this functionality can be integrated using predefined templates.


